Our professional editors joined more than 5 most popular herpes dating sites/apps. They picked PositiveSingles.com as the best choice from the best.
They have tested all the features (including guest features and paid features) and made the final choice.
Since we received many emails about how to have a full use of herpes sites, we will take PS (PositiveSingles.com in short) as an example and make a series of guides about how to use them safely and fully.
PositiveSingles, built in 2001, is a popular herpes dating site which brings people with herpes together for support, date, and love.
You can easily set up a PositiveSingles account and start using it in a few minutes. Let’s begin.
Part 1: Creating an account
1. Visit the PositiveSingles website or open the PositiveSingles app.
You can create a profile from the PS homepage or from the PS app. You can install the app for free from your devices’ app store.
The PS profile is available on all the platform. And the profile creation process is similar for both the website and app.
Please note that you can also visit PS website via mobile device. It’s mobile-friendly.
2. Click “JOIN FOR FREE” or tap“Join Free”.
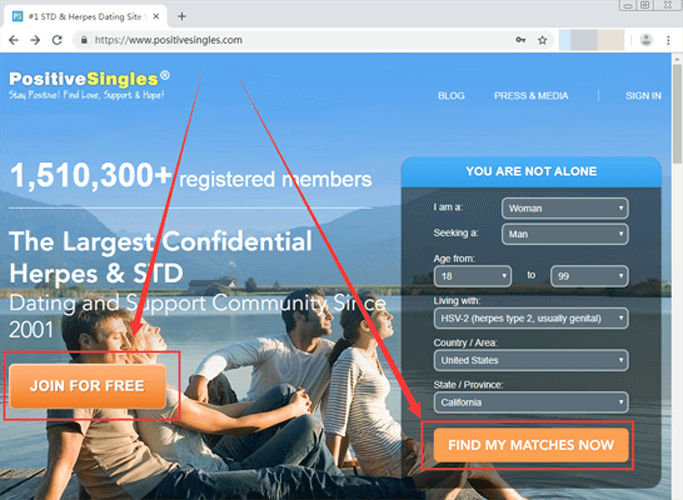 On the PS website, you can also click the button “FIND MY MATCH NOW” and the text link “Meet Positive Singles in Your Area TODAY” to join.
3. Fill out the required options with your personal information.
On this section, you need to fill out some personal information.
▪ You’ll need to enter your gender, your match gender, your age, and your email address. Don’t forget to click on “Agree to both the Service Agreement and the Privacy Policy”. 
Make sure your email address is valid because you need to verify it. What’s more, you will receive all the site notifications and messages.
We suggest you register a new email address which is only for dating. It will be safer.
▪ Create your first name, username, and password.
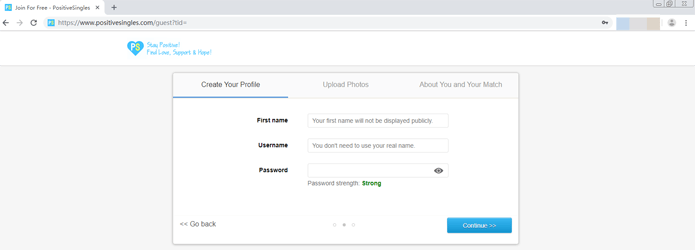
First name isn’t visible publicly. So you can pick one as you like.
Username is important on the site. It will be along with you everywhere on PS. So we suggest you pick it seriously. Trying to use a special one.
Do not use the real name as your username considering a better security and privacy.
As for the password, please create a strong and secure one, for example, the combination of number, letter, and symbols etc.
If you are afraid of forgetting it, you can write it down in a notebook or your mobile note.
▪ Next, you need to choose Country, Zip, Height, Ethnicity, Relationship Status, and Living with.
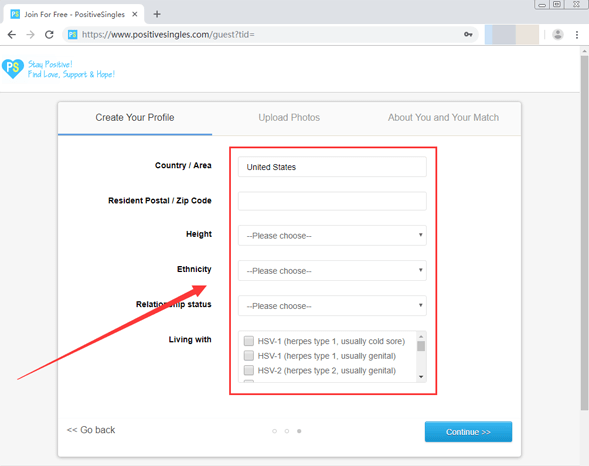
If you are looking for a serious relationship, we suggest you fill out the real information.
4. Upload a photo
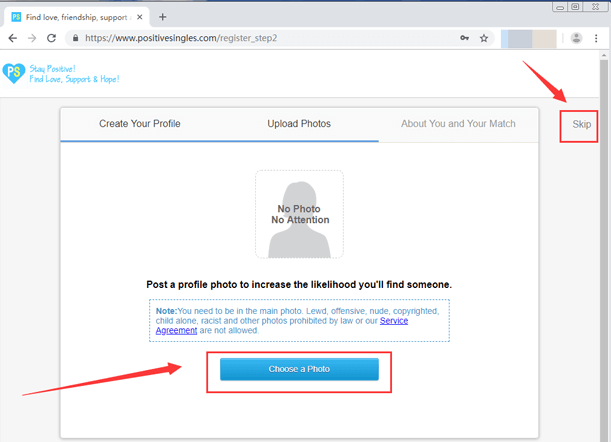 As we tested, PS allows the user to register without a photo. What’s more, members can upload an anonymous photo (No sex, porn or other low-quality photos).
We guess that it’s a way to protect users’ privacy. So you decide to upload it or not.
Furthermore, if you don’t want your photo visible to all the PS members, you can upload photos to the private album. Then you can decide who can view them. We must say that private album is one of our favorite features.
Then upload a photo or skip the process to the next step.
5. Filling out “About You” and “About Your Match”
▪ Profile headline (10 characters minimum). Write anything you like. A little advice: be positive and real. 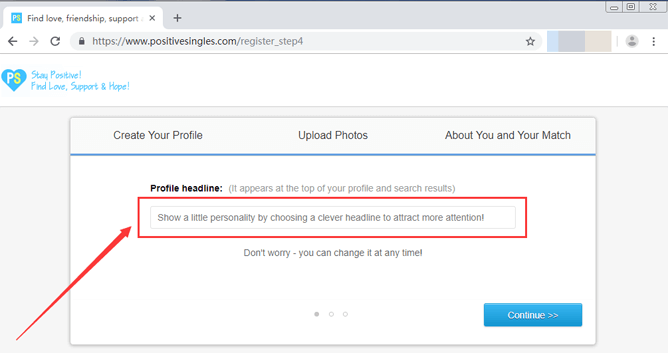
▪ About me (50 characters minimum). Anything you want to share with the potential partner. 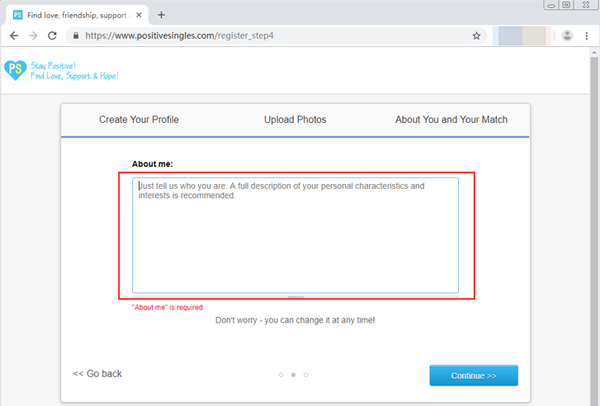
▪ About my match/friends (50 characters minimum). Describe your potential partner in details in this section. 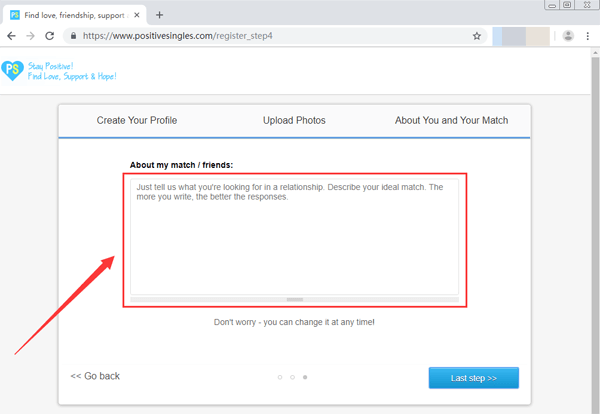
If you don’t know what to write or how to write, it will be ok as well. Just type something anonymously. Then improve it later.
Part 2 Verification
1. Email Verification
In order to receive PS notifications and messages, you’ll need to confirm your email address. You will receive an email after you clicked “verify email” button. Click the “Verify email address” button in the email message or copy&paste the link into your browser to confirm your email address.

It’s also a security method to protect your profile.
If you can’t find the email, check your spam folder.
2. Photo Verification
If you didn’t upload any photo, then no need to read this step.
If you have uploaded your personal photo to the public album, you can verify the photo. Then visitors can know that you are real and serious. Two methods to verify the photo:
▪ Upload a readable copy of your clear ID (Driver’s License, State ID card, Military ID or Passport, NO PERSONAL PHOTOS, NO EXPIRED ID). Do not black out any information except identification numbers on the ID card. 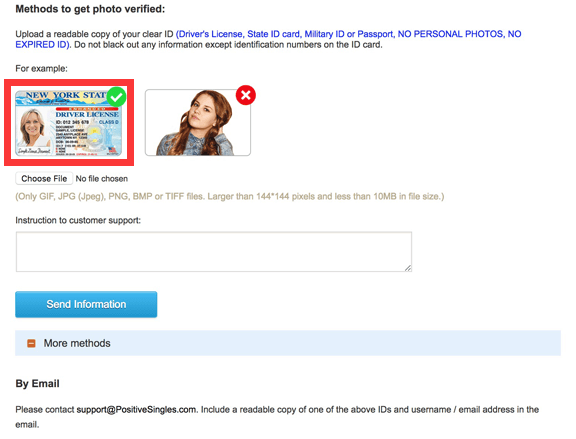
▪ Send PS support email a photo of yourself holding a sign with Positive Singles, your username and the date on it . 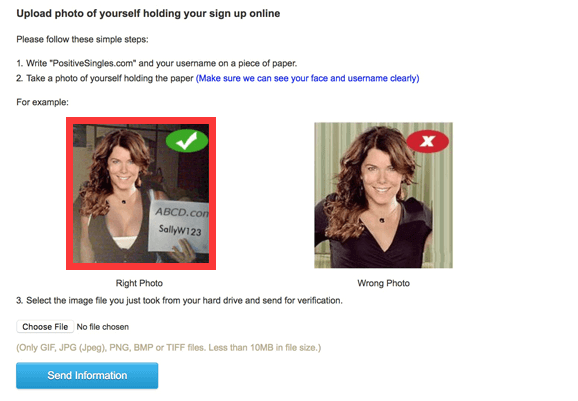
We suggest you using the second one if you are unsure of the security.
If you want to know more about PositiveSingles.com, click the link to read the review.